
Tool Guides
How to Clean and Maintain Pruning Shears for a Lifetime of Sharp Cuts
Oct
Pruning shears are the hardest-working tool in most garden sheds. They snip rose stems, shape hedges, harvest herbs, and cut back perennials season after season. But like any hard worker, they wear down without care. A dirty, dull pair crushes stems instead of cutting them, leaving ragged wounds where disease can creep in — and it turns a quick trim into a hand-aching chore.
The good news: a few minutes of maintenance after each use will keep your shears slicing cleanly for years. Here is everything you need to know.
Why Maintenance Matters
Every cut your shears make exposes plant tissue. A sharp, clean blade makes a smooth cut that heals fast. A sticky, rusted blade tears the stem and can spread fungal spores or bacteria from one plant to the next. Gardeners sometimes blame a dying shrub on bad luck when the real culprit was a tool that had not been cleaned in months.
Regular maintenance also protects your investment. Sap and moisture are the two biggest enemies of pruning shears. Sap hardens into a gummy residue that stiffens the pivot and throws off blade alignment. Moisture left on steel invites rust, which pits the edge and weakens the metal. A simple wipe-down takes thirty seconds and prevents both problems.
What You Need
You do not need a fancy kit. Gather these basics before you start:
- Warm soapy water (dish soap works fine)
- A stiff brush or old toothbrush
- A clean rag or paper towels
- Rubbing alcohol or household disinfectant
- A sharpening stone or diamond file
- Camellia oil, mineral oil, or any light machine oil
- Gloves, to protect your hands from the blades
Step-by-Step Cleaning
Clean your shears after every use, or at minimum at the end of each gardening day. Here is the full routine:
- Open the blades and knock off debris. Tap the shears gently to dislodge leaves, twigs, and loose dirt.
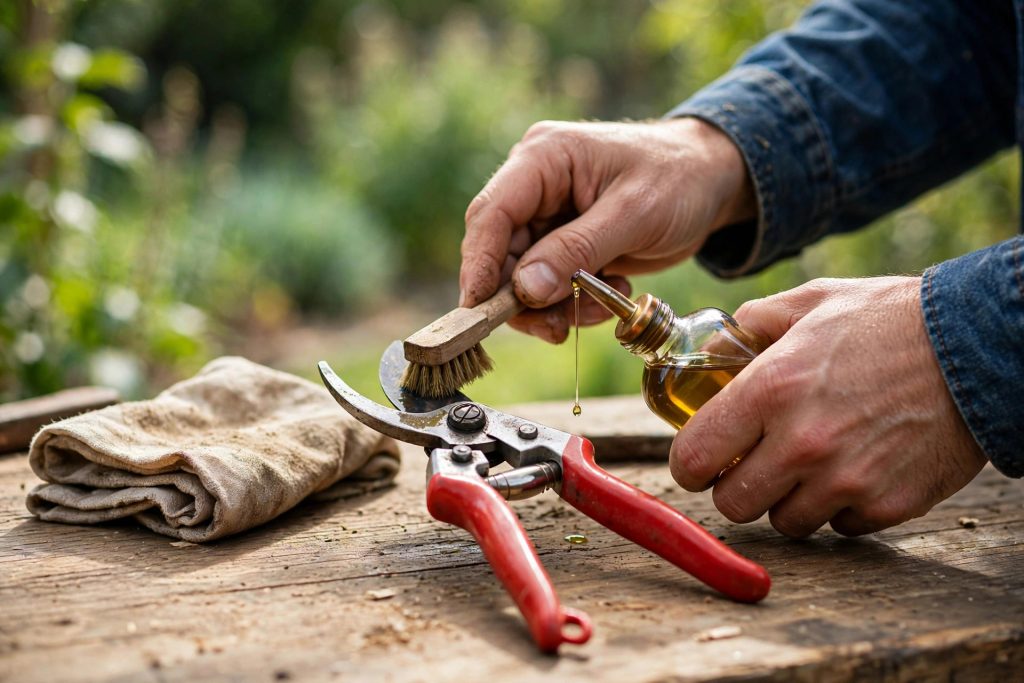
- Scrub with soapy water. Dip the brush in warm soapy water and scrub both blades, the pivot area, and the handles. Pay attention to the joint where sap loves to hide.
- Rinse and dry completely. Rinse under running water, then dry every surface with a clean rag. This step is the one most people skip — and it is the most important for rust prevention.
- Disinfect the blades. Wipe the blades with rubbing alcohol or a disinfectant wipe. This kills any pathogens picked up from diseased plants. Disinfecting is especially important when moving between plants, or after cutting anything that looked sick.
- Remove stubborn sap. If dried sap remains, rub it with a rag dampened with a little rubbing alcohol or vegetable oil, then wipe clean.
- Oil the pivot. Put one drop of oil on the pivot bolt and work the handles open and closed a few times to distribute it. Wipe away any excess.
That is the whole routine. Once it becomes habit, it takes less than two minutes.
Sharpening Basics
Even clean shears eventually dull. A sharp blade should cut printer paper with a single snip — if yours tears the paper or folds it, it is time to sharpen.
Bypass pruners have one beveled blade and one flat blade. You only sharpen the beveled edge. Hold the sharpening stone against the bevel at the same angle as the existing edge (usually about 20 to 25 degrees) and draw it along the blade in smooth, even strokes, moving from the base toward the tip. Use light pressure and keep the angle steady — consistency matters more than force. After five to ten strokes, flip the shears over and lay the stone flat against the back of the blade for one or two light passes to remove the burr.
Anvil pruners sharpen the same way on their single beveled blade. Sharpen little and often rather than waiting until the edge is badly worn. If you are unsure, many local garden centers offer blade-sharpening services for a few dollars.
Oiling and Lubrication
Oil does three jobs: it keeps the pivot moving smoothly, protects steel from moisture, and prevents sap from sticking. After cleaning and sharpening, apply a thin film of oil to the blades with a rag, plus that single drop on the pivot bolt. Camellia oil is the traditional choice among gardeners because it is plant-safe and will not go rancid, but plain mineral oil works just as well. Avoid heavy grease, which attracts dust and grit.
Storing Your Shears Properly
How you store shears matters as much as how you clean them. Always close the safety latch before putting them away — it protects the edge and your fingers. Store them in a dry spot, not on a damp garage floor or in an outdoor shed where condensation forms overnight. Hanging them on a pegboard keeps blades off surfaces and makes them easy to grab.
For winter storage, give the shears a full clean, sharpen, and oiling, then wrap them in a lightly oiled cloth. Come spring, they will be ready to work on day one.
Signs It Is Time to Replace Them
Maintenance extends a tool’s life, but nothing lasts forever. Replace your shears when:
- The blades are deeply pitted with rust that sharpening cannot remove
- The pivot is loose and cannot be tightened, so the blades wobble
- The blade has been sharpened so many times the edge is thin or nicked beyond repair
- A spring or latch is broken and replacement parts are unavailable
When you do upgrade, look for replaceable parts and comfortable grips — the features that made your old pair last are the ones worth paying for again.
Keep Them Sharp, Keep Gardening
A well-maintained pair of pruning shears makes every gardening task easier and keeps your plants healthier. Build the quick clean-and-oil routine into the end of each garden session, sharpen when the paper test fails, and store them dry — your shears will reward you with years of crisp, effortless cuts.
Ready to upgrade or add to your collection? Browse our pruning and cutting tools for shears, loppers, and snips, or check out our garden tool sets and storage for complete kits that keep everything organized.
