
Tool Guides
How to Sharpen Garden Tools at Home: A Beginner-Friendly Guide
Oct
A dull garden tool makes every job harder. Instead of slicing cleanly through a branch, a dull blade crushes and tears plant tissue, leaving ragged cuts that heal slowly and invite disease. Dull tools also demand more force, tire your hands faster, and are more likely to slip. The good news: sharpening is a simple home skill. With a few inexpensive supplies and about fifteen minutes per tool, you can bring most blades back to life.
Why Sharp Tools Matter
Clean cuts are the foundation of healthy plants. When pruning shears slice through a stem cleanly, the wound seals quickly and the plant redirects energy to new growth. Torn, crushed cuts do the opposite — they are open doors for fungi and bacteria.
Sharp tools also make you safer and faster. A sharp shovel slides into soil instead of bouncing off it. A sharp hoe severs weeds with one pass instead of three. You use less force, and the work gets done in half the time.
What You Need
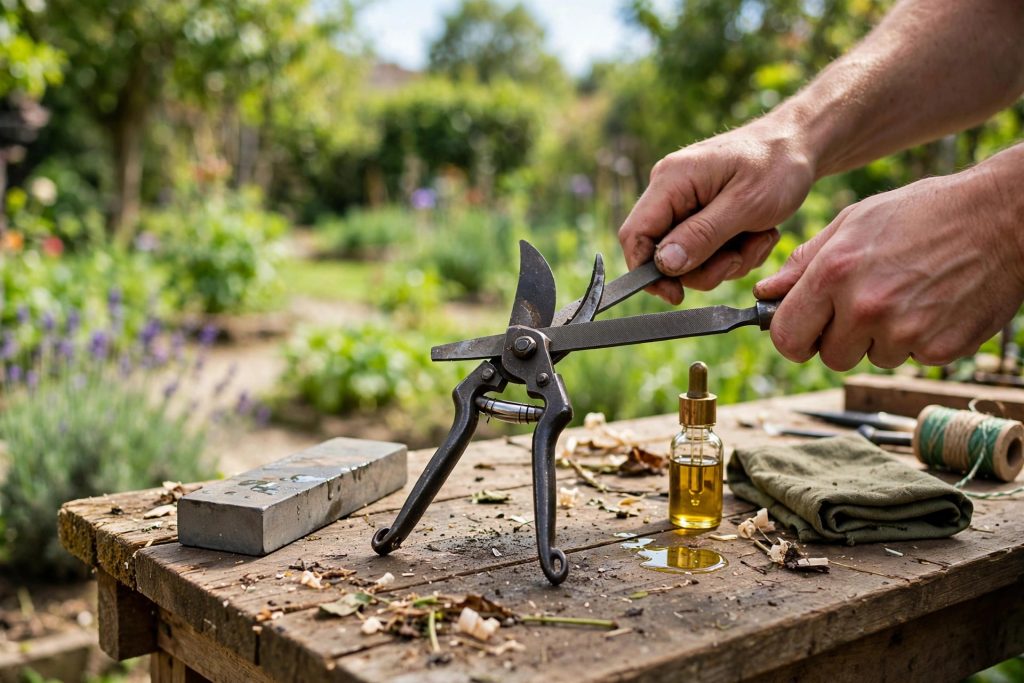
You do not need a workshop full of equipment. A basic sharpening kit handles nearly every garden tool:
- A 10-inch flat mill file (also called a bastard file) — the workhorse for shovels, hoes, and loppers.
- A combination whetstone (coarse and fine grit) — ideal for finer edges on pruning shears and hand tools.
- A bench vise or clamp — holds the tool steady so you can file with both hands.
- Safety gloves and glasses — thick leather gloves protect your hands, and glasses guard against flying metal filings.
- A wire brush or steel wool — for cleaning rust and grime off the blade before you start.
- Lubricating oil (camellia or mineral oil) — for coating the blade after sharpening.
Safety First
Sharpening is safe when you respect the edge. Always wear gloves and safety glasses. Clamp the tool firmly so it cannot move while you file — a wobbling tool is how slips happen. File away from the cutting edge, never toward your body. Take slow, controlled strokes.
Step-by-Step: Sharpening Common Garden Tools
1. Clean the Blade
Start with a clean blade. Scrub off dirt, sap, and rust with a wire brush or steel wool and soapy water, then dry it completely. Sharpening a dirty blade grinds grime into the edge.
2. Secure the Tool
Clamp the tool in a vise with the cutting edge facing up. If you do not have a vise, clamp it to the edge of a sturdy workbench. It should not move at all when you push against it.
3. Sharpen Pruning Shears and Loppers
Pruning shears and loppers have a beveled edge on one side only — the flat side should stay flat.
- Open the shears fully and lock them open if your model has a latch.
- Identify the beveled side of the blade (the angled side). The flat side is never sharpened.
- Place the file flat against the bevel, matching its original angle (usually around 20–25 degrees).
- Push the file away from you in long, smooth strokes, following the curve of the blade. Lift the file on the return stroke — files cut in one direction only.
- After about 10–15 strokes, feel for a burr (a tiny raised ridge) on the flat side. That burr means you have reached the edge.
- Flip the tool and make one or two very light passes on the flat back side to knock the burr off.
- For hand shears, finish on a whetstone: a few light strokes on the bevel side with the fine grit gives a razor-smooth edge.
4. Sharpen Shovels, Spades, and Hoes
Digging and chopping tools do not need a razor edge — a clean, slightly rounded bevel is perfect.
- Clamp the tool with the blade edge up.
- Note the existing bevel angle on the blade (usually 30–45 degrees).
- Hold the mill file against the bevel at that same angle.
- Push the file across the blade in smooth, even strokes from one end to the other, always filing away from the cutting edge.
- Work the entire width of the blade evenly — do not favor one spot, or you will create a wavy edge.
- Flip the tool and remove the burr with one or two light passes on the back side.
- Aim for an edge that feels sharp to the touch but is not knife-sharp. A slightly robust edge holds up better in soil and against roots.
5. Sharpen Trowels and Hand Cultivators
Hand tools sharpen the same way as their bigger cousins, just on a smaller scale:
- Clamp or hold the trowel firmly (gloves on).
- Use the whetstone or a small file on the beveled edge, matching the existing angle.
- Make about 10 short, controlled strokes per side of a V-shaped cultivator tine.
- Remove the burr and wipe clean.
Testing Sharpness
You do not need fancy equipment to check your work. For pruning shears and loppers, slice a sheet of paper — the blade should cut cleanly without tearing. For shovels and hoes, press the edge gently against your thumbnail at an angle: a sharp edge bites and stops, while a dull edge slides. Never test sharpness by running a finger along the blade.
Oil After Every Sharpening
Freshly sharpened steel is bare steel, and bare steel rusts fast — especially in a damp shed or garage. After sharpening, wipe the entire blade with a rag lightly coated in oil. Work a drop or two into any pivot points on shears and loppers, then open and close them a few times to distribute it. This single step doubles the life of your edge.
How Often Should You Sharpen?
It depends on the tool and how hard you work it. As a rule of thumb:
- Pruning shears: touch up every few weeks during heavy pruning season, or whenever cuts start looking crushed instead of clean.
- Loppers: once or twice a season.
- Shovels, spades, and hoes: once a season, or whenever the edge starts bouncing off hard soil.
- Trowels and hand tools: once a season is plenty for most gardeners.
A quick five-minute touch-up is always better than waiting until the tool is completely dull. Frequent light sharpening removes less metal, so your tools actually last longer.
Keep Your Edges Longer
Sharpening restores an edge, but habits preserve it. Never use pruning shears on wire, nails, or hard deadwood — keep a small saw for those jobs. Store tools hanging or in a dry rack instead of piled in a bucket where blades knock together. Clean blades after each use, especially after cutting sappy plants, and give them a light coat of oil before putting them away for winter.
Learning to sharpen your own garden tools is one of the highest-value skills a gardener can pick up. It costs almost nothing, takes minutes once you know the motions, and your plants will reward you with cleaner cuts and faster healing.
When a tool is truly worn beyond sharpening, browse the Pruning & Cutting and Tool Sets & Storage collections for quality replacements and complete kits.
